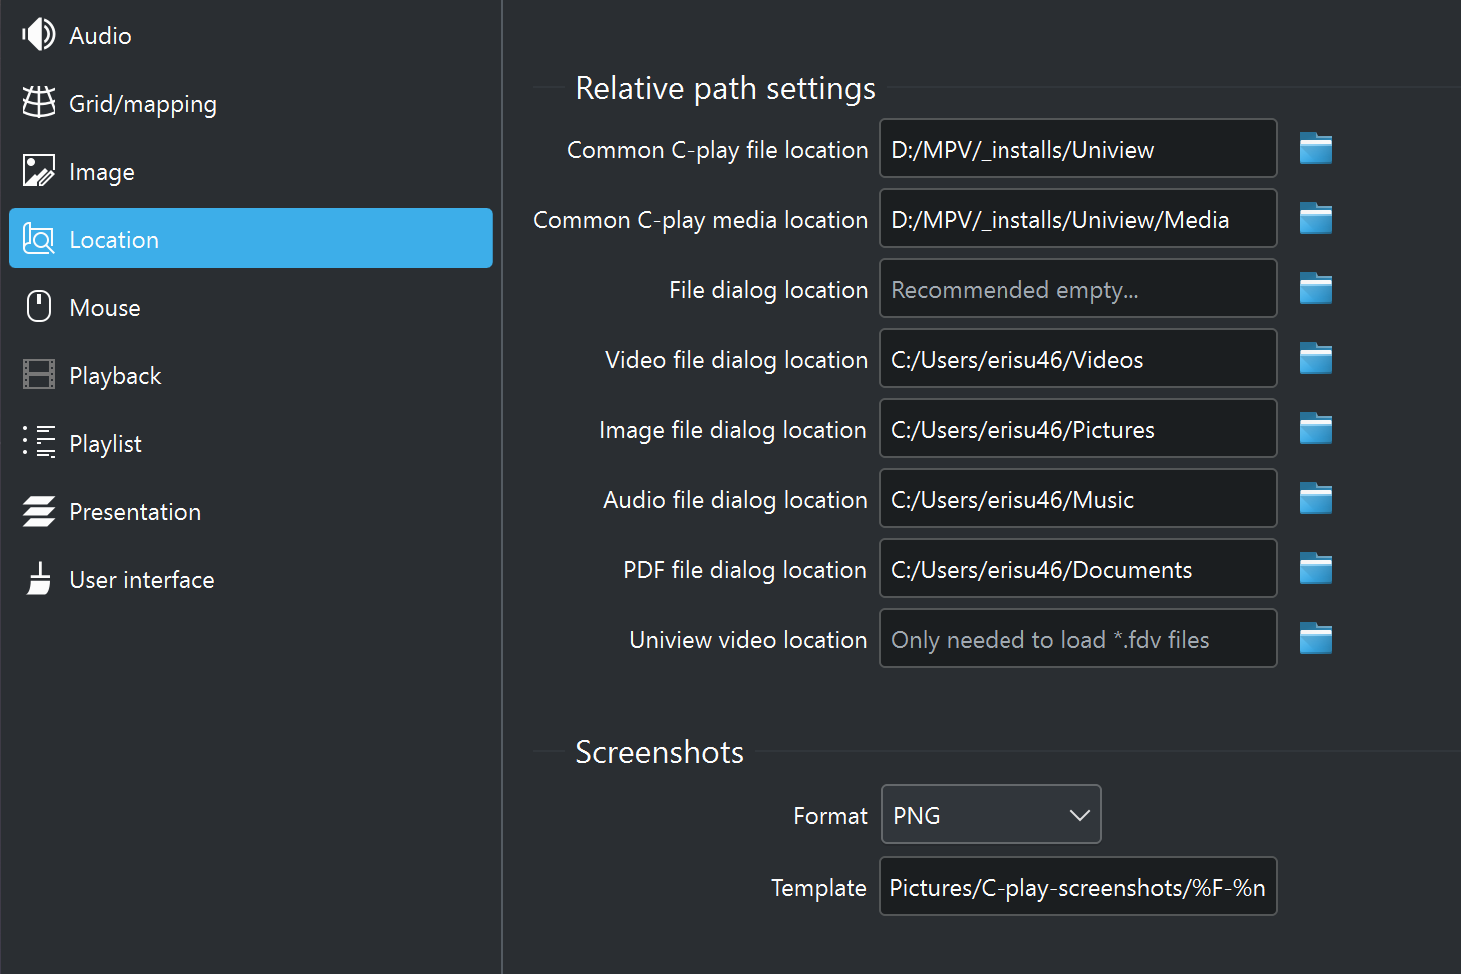
Location settings
There are several optional file locations you can set that simplify file management in C-Play.
These are found in “Settings -> Configure -> General”.
1. Common C-play file location (recommended to set)
This is the folder that you preferably store all saved “.cplayfile” and “.cplaylist” files. When this folder is set it will be used as the default folder for saving of these files, as well as when adding already saved “cplayfile(s)” to the playlist. A “.cplaylist” will also use relative path to “.cplayfile(s)” when this is set.
2. Common C-play media location (recommended to set)
The base location where your media is stored. The benefit of setting this path is that when you save a “cplayfile”, the paths to media, audio, overlays, and so on will be relative. This simplifies moving content across drives if necessary.
3. File dialog location (recommended empty)
The file dialog location can be set to a preferred path that C-Play will always open when clicking “Open File”. By default, this is empty, and C-Play instead opens the last path you loaded a file from.
4-7. Default file location for various layer types (from C-Play v2.1 and newer)
There are specific file location settings for various file dialogs used with the Layer functionality introduced in C-Play v2.1. They are normally set to the file type-specific path in Windows (for video, pictures, music and documents (for PDFs)). However, please feel free to change this depending on how you store files on your cluster.
8. Uniview video location (legacy)
C-Play supports loading Uniview “.fdv” files for use in an environment where Sciss Uniview is running alongside it, or has been used before. Those paths are relative by nature, so C-Play needs to know where Uniview looks for the video files, which should be this path. Still, it is highly recommended to move toward using only “cplayfile” and “cplaylist”, which are both easy to use in C-Play and more powerful.
Screenshots
- Screenshot path — The folder where screenshots are saved. Default is C-Play’s “data/images” folder.
- Buffer source — Choose which rendering stage to capture:
- Before Warping and Blending — captures the frame before digital warping and/or masking.
- After Warping and Blending — captures the final output as displayed.
- Take Screenshot — Captures a screenshot on all cluster nodes and saves it to the configured path.