Presentation (Slides & Layers)
A presentation can be built according to the guide seen here.
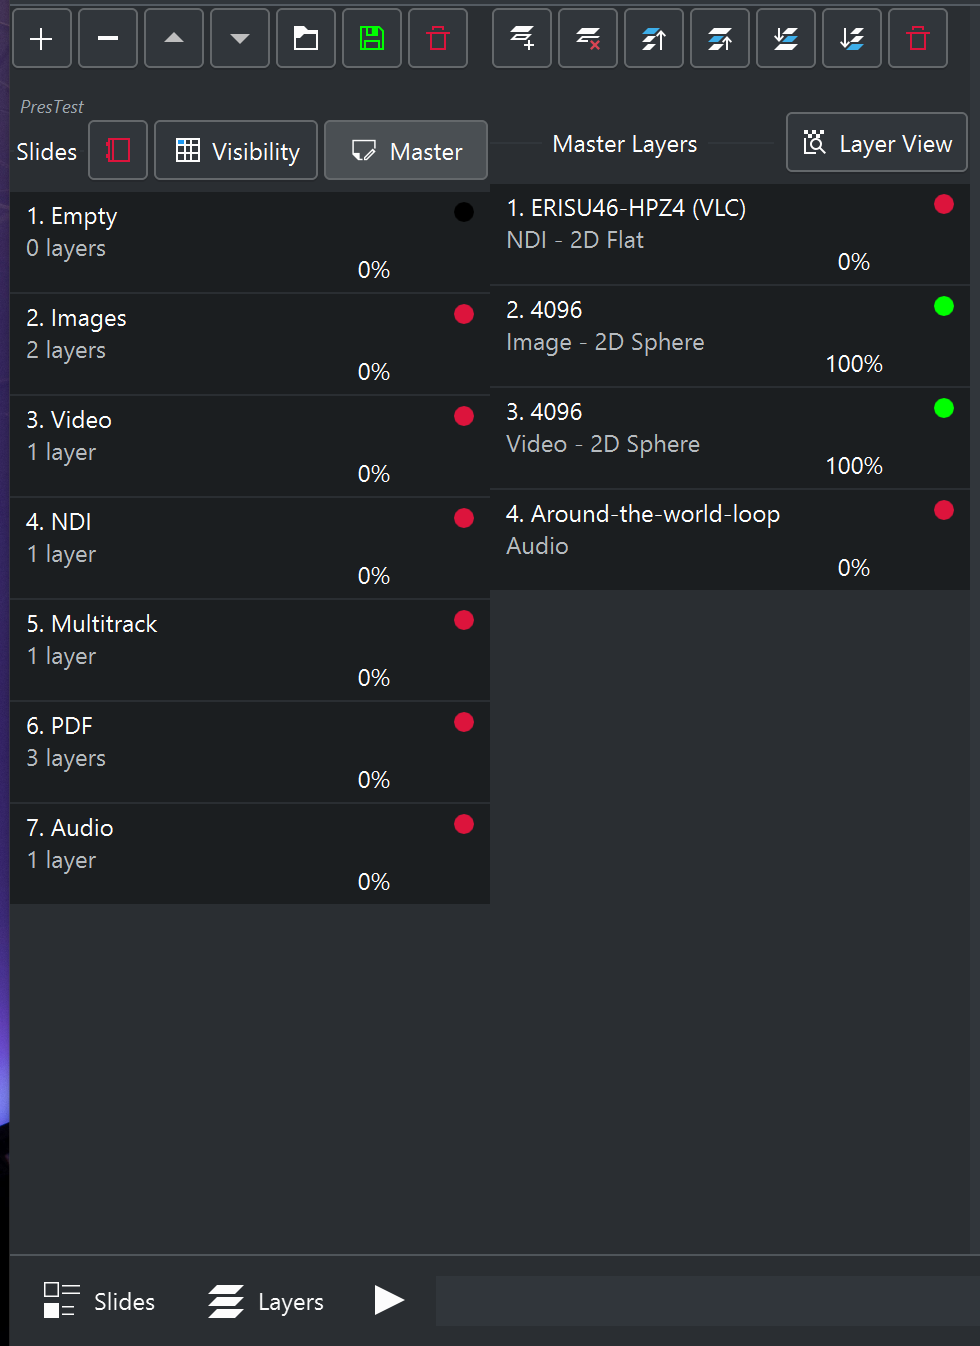
To play a presentation, you can use the left and right arrow keys on the keyboard, if you have not changed the default shortcuts, to move forwards and backwards through the slide deck. At startup, when a presentation is loaded, no slides other than master layers should ideally be visible. This is good practice before saving the presentation, as seen in the left image below. Notice that the “pre-load icon” ![]() to the right of “Slides:” is always red at startup. This prevents pre-loading from occurring if the presentation is not supposed to be used, even if it is loaded at startup.
to the right of “Slides:” is always red at startup. This prevents pre-loading from occurring if the presentation is not supposed to be used, even if it is loaded at startup.
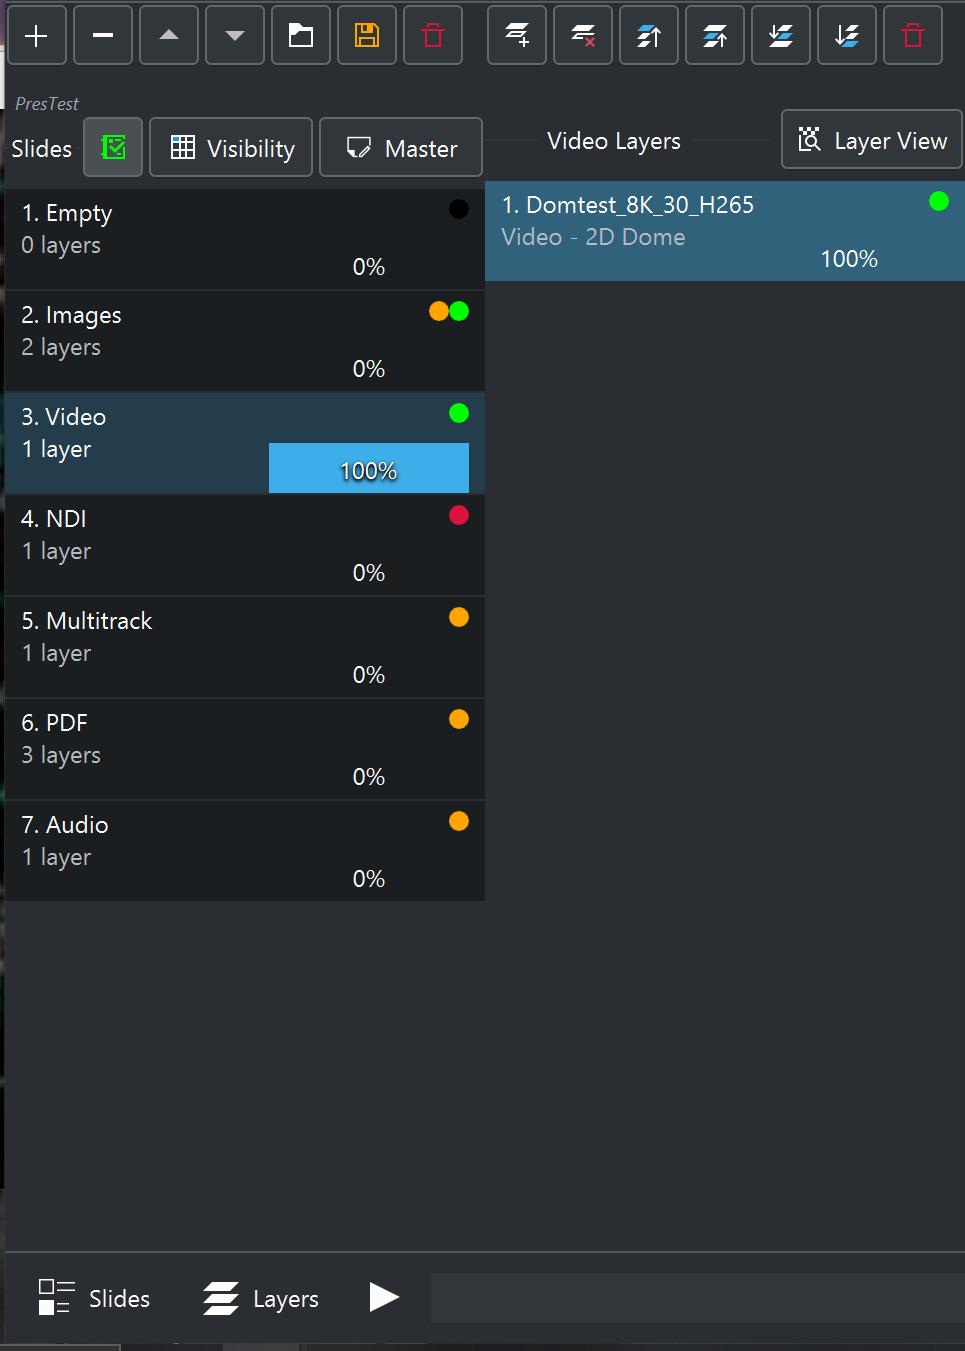
As seen in the middle image, when pressing the “Pre-Load” button ![]() , it turns green and all slides shift from Red to Orange, which means the slides and layers are loaded, but not yet visible. When a slide is triggered and the layers become visible, they turn Green. If a slide contains both visible and non-visible layers, two colors might show in the slide, as indicated in the image below to the right.
, it turns green and all slides shift from Red to Orange, which means the slides and layers are loaded, but not yet visible. When a slide is triggered and the layers become visible, they turn Green. If a slide contains both visible and non-visible layers, two colors might show in the slide, as indicated in the image below to the right.

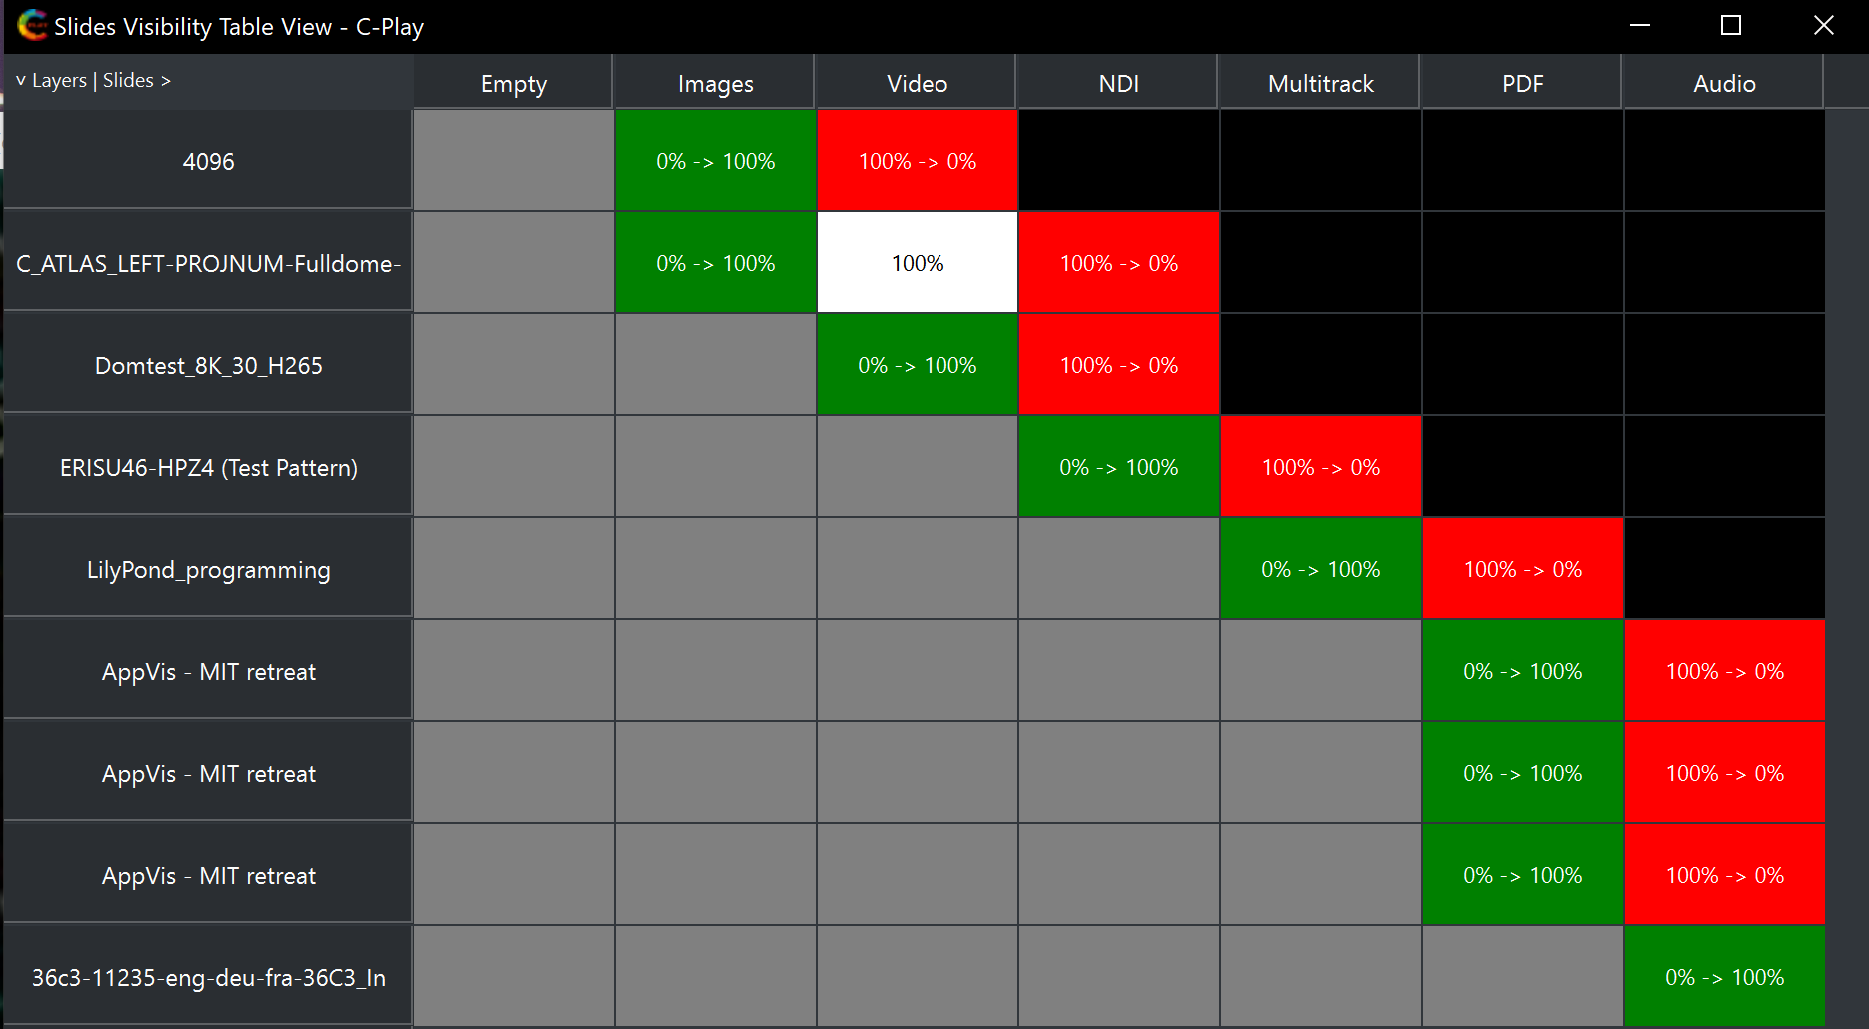
In the “Visibility” ![]() window, you can set layers to be visible during multiple slides, which may come in handy if you want background media to stay visible during a set of slides while fading in layers one by one.
window, you can set layers to be visible during multiple slides, which may come in handy if you want background media to stay visible during a set of slides while fading in layers one by one.
For changing the presentation timings, this is made in the “Settings -> Configure ![]() -> Presentation”, as seen here.
-> Presentation”, as seen here.
Layer operation modes (C-Play v2.3 and newer)
NDI, Stream, and OMT layers support a Layer Operation mode that controls how the layer’s texture is subdivided into sublayers. The mode is selected via a combo box in the layer view:
| Mode | Description | Supported by |
|---|---|---|
| None | No subdivision — the layer displays normally. | All layers |
| ImPres Mode (QR) | QR code-driven sublayer control (see below). | NDI, Stream |
| Division Mode | Static grid-based texture division (see below). | NDI, Stream, OMT |
When a sublayer mode is active, the layer view shows a Sub-Layer selector and highlights the selected sublayer’s region in yellow on the preview.
Division Mode
Division Mode splits the layer’s live video texture into a configurable grid of sublayers. This is useful for displaying multiple views or regions from a single video source across different positions in the dome or sphere.
When Division Mode is selected, a Division combo box appears with the following grid options:
| Grid | Layout |
|---|---|
| 1×1 | Single (no split) |
| 1×2 | 1 column, 2 rows |
| 2×1 | 2 columns, 1 row |
| 2×2 | 2 columns, 2 rows |
| 2×3 | 2 columns, 3 rows |
| 3×2 | 3 columns, 2 rows |
| 3×3 | 3 columns, 3 rows |
Each sublayer points to a region of the parent texture (no copy) and can have independent alpha, grid mode, plane parameters, rotation, and translation — all editable via the grid parameters panel.
QR code presentation mode (ImPres)
ImPres is a QR code-driven presentation mode. When enabled, C-Play scans incoming video frames for QR codes and uses them to control frozen video sublayers — useful for interactive multi-angle presentations where a camera feed carries embedded QR commands.
![]()
Enabling ImPres
In the layer view for an NDI or Stream layer, select “ImPres Mode (QR)” from the Layer Operation combo box. This setting is saved with the presentation. OMT layers do not support ImPres mode.
Example
You can open the example PowerPoint at data/impres/ImPres_PPT_Template.ppt, which shows one practical way to display the QR codes so they are visible immediately when a new slide appears and then disappear quite quickly.
How it works
The system uses a two-phase processing scheme:
- Phase 1 (control frame): A QR code is detected in the video frame. The command is queued and the frame is skipped — the previous clean frame stays on screen so the QR code is never visible to the audience.
- Phase 2 (clean frame): No QR code is detected. All queued commands are executed and the frame is displayed normally.
This means the QR code only needs to appear for a single frame to be picked up.
QR command format
Commands are encoded as text in the QR code using semicolons as delimiters:
<target>;<action>
Targets are plane names defined in the configuration file (see below), or All for bulk operations.
Actions:
| Action | Description |
|---|---|
SetActive | Switch to this plane — freeze all other sublayers and start displaying live video in the target plane. If the plane does not exist yet, it is created. |
Clear | Fade all sublayers to transparent (use with target All). |
Multiple actions can be chained: FrontCapture;SetActive;Freeze.
Predefined planes
Planes define where frozen sublayers appear in the dome or sphere. They are configured in data/impres/config.json:
{
  "planes": [
    { "name": "FrontCapture" },
    { "name": "LeftCapture", "azimuth": -45 },
    { "name": "RightCapture", "azimuth": 45 },
    { "name": "TopCapture", "elevation": 65 }
  ]
}
Each plane can optionally specify height, azimuth, elevation, roll, and distance. Properties that are not specified are inherited from the parent layer.