C-Play iPad Control Interface
This UI, currently used in the Visualization Center C, is an example of how C-Play can be used with a remote UI. This exact one is specific to this site, but feel free to use the generic one that can be found here.
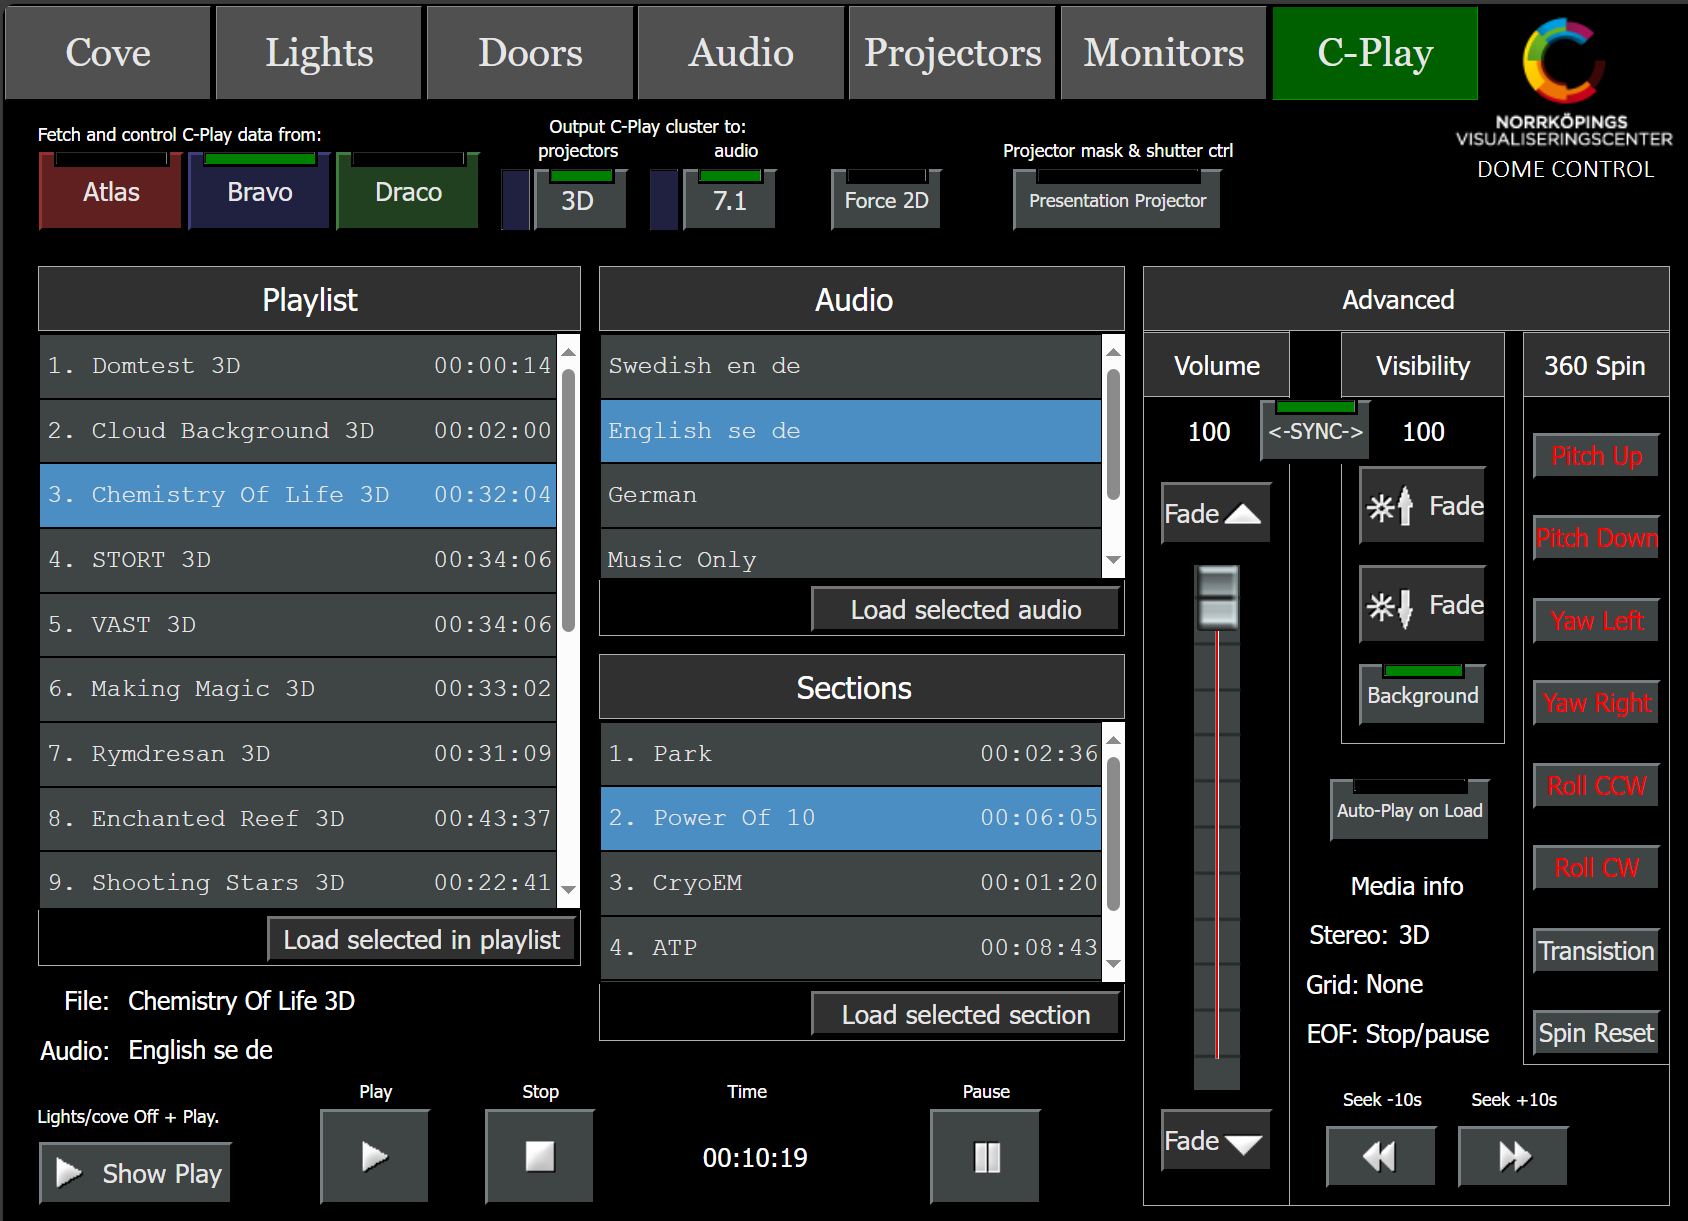
Guide to this “C-Play Dome Control” UI
-
Make sure C-Play is started on the cluster you want to use. There should be a desktop shortcut (C-Play [Atlas], C-Play [Bravo] or C-Play [Draco]) on each master PC.
-
Select the cluster that C-Play runs on, for instance Atlas (as image above). When you press that button, the UI will check the connection to the master PC of that cluster, and fetch all data (current playlists, media file, volume level etc) from that master UI.
-
When the update/fetch is complete, feel free to choose any item in the playlist. When you have selected one, press the button named “Load selected in Playlist”. You will notice the fields below and the lists named “Audio” and “Sections” will update after a few seconds.
-
If you want to change the language, do so in the “Audio” list and if you want to jump to a certain part of a movie, do so in the “Sections” list. Select first, then press the load button below the list.
-
Then just press “Play” to start playing the media.
- Optionally: You can choose to fade out both image and volume (or either of them), and then fade in them just before you play. There is also a button (top right) named “Show Play”, that dims lights in the dome, fades up the video image and starts playing, all in one button press.
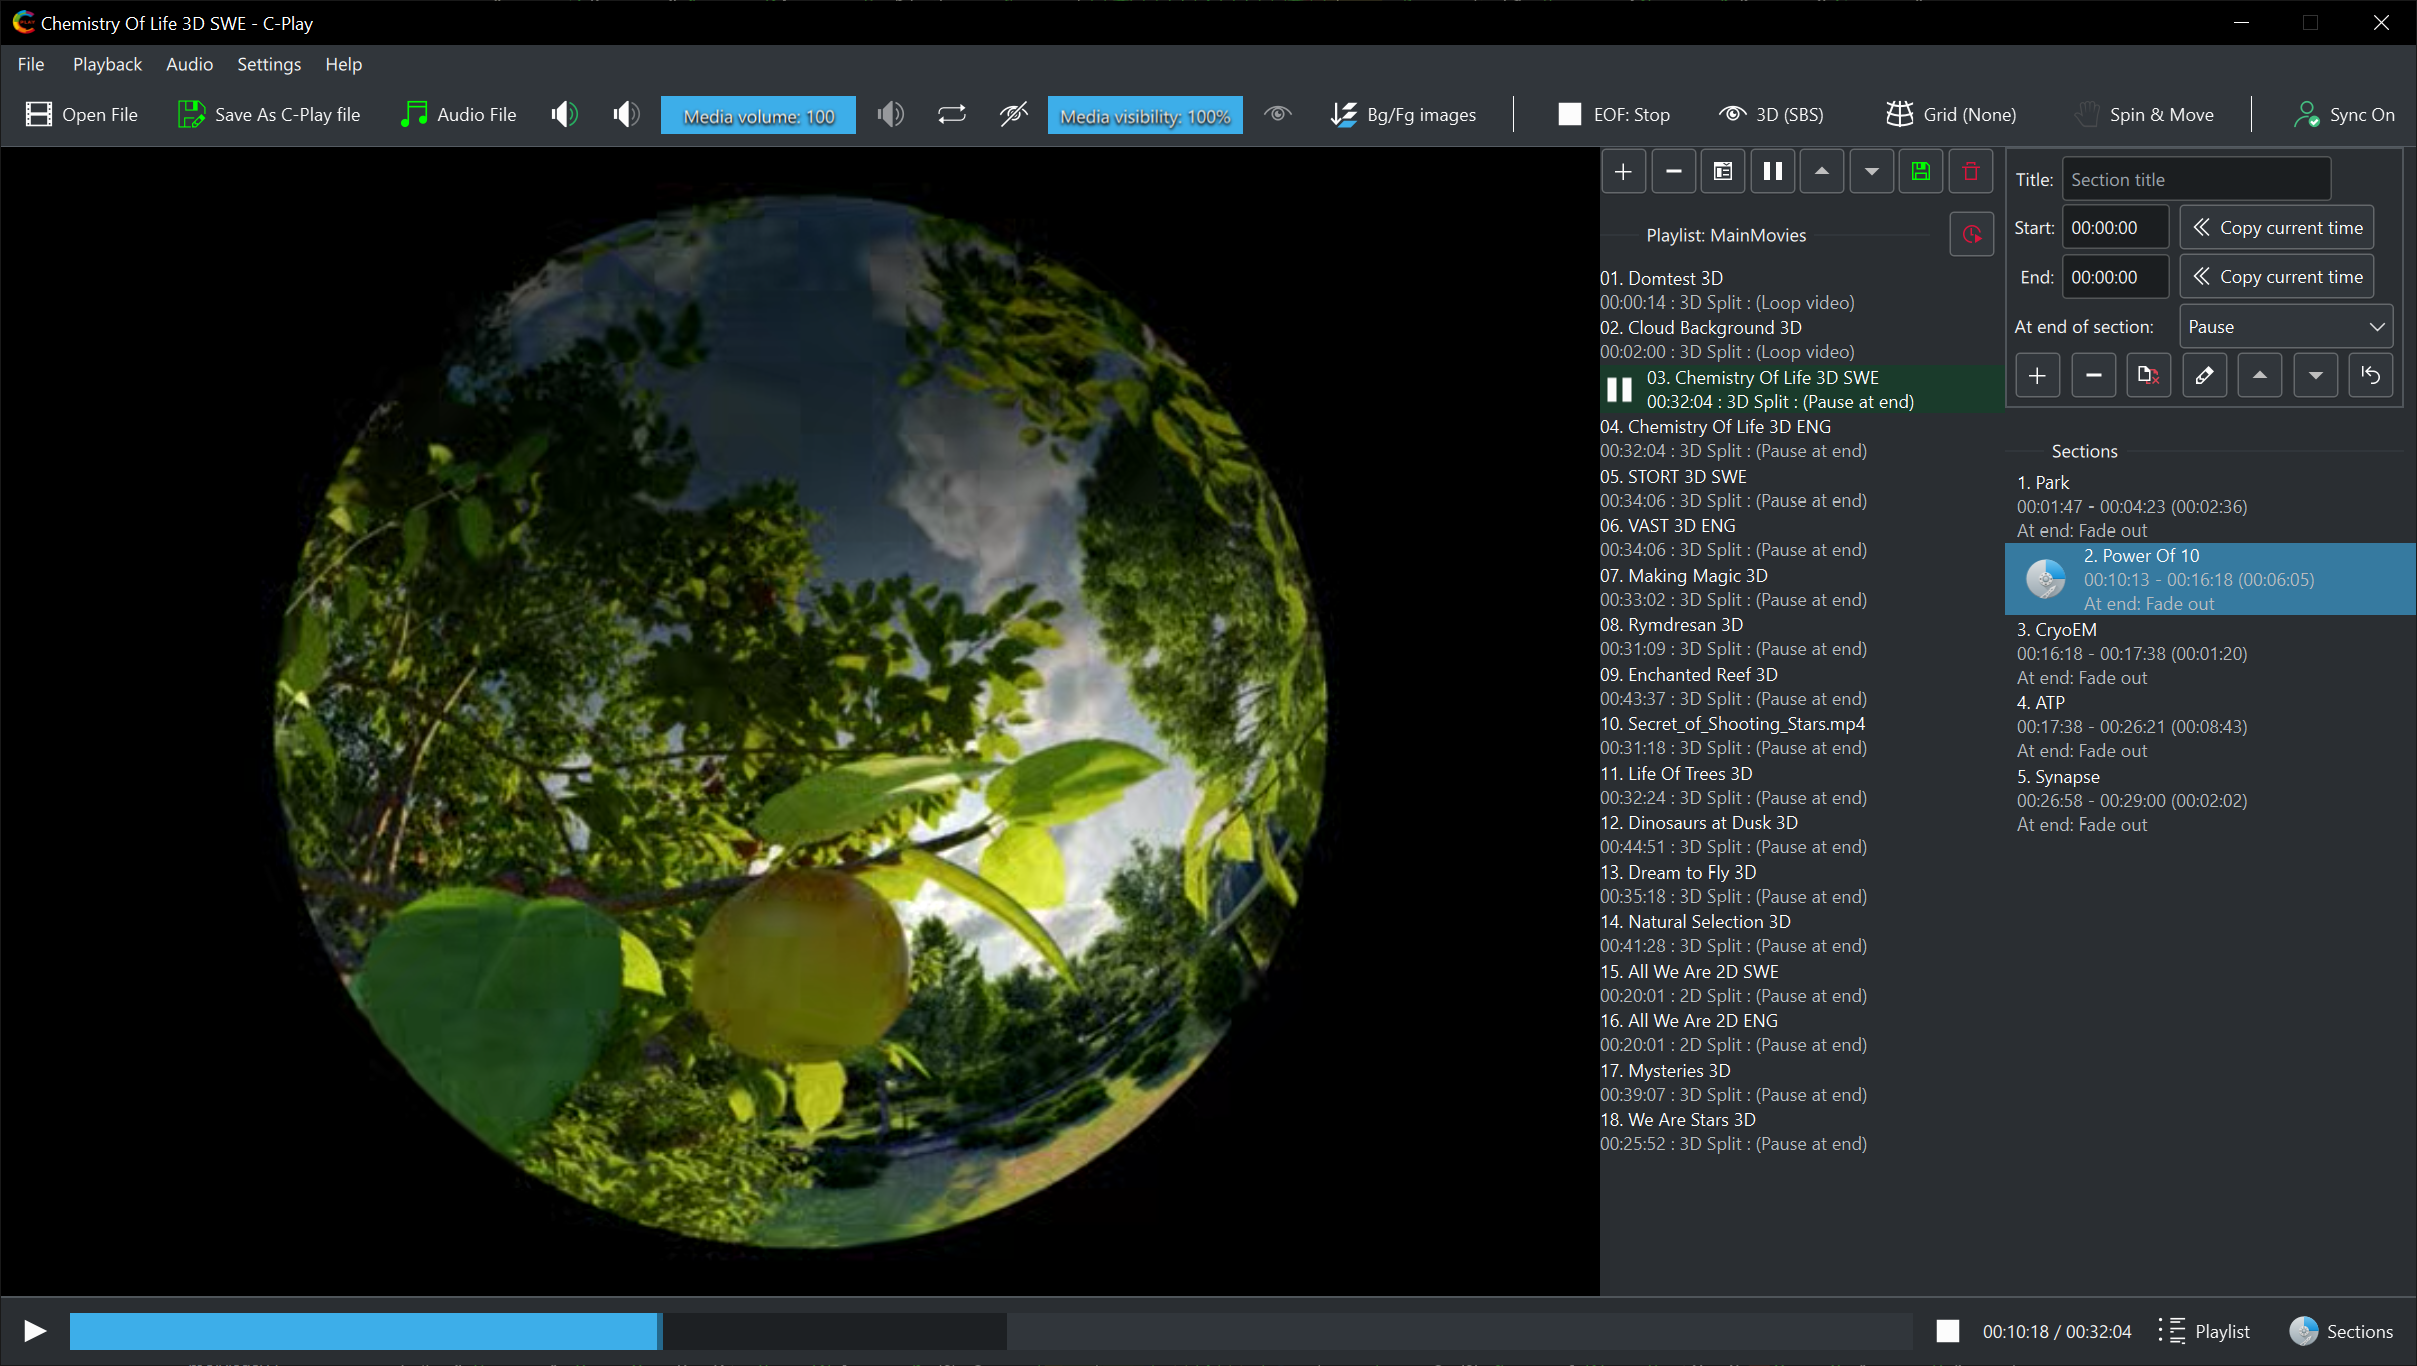
As seen in the image below, the data that was fetched in the remote UI above, comes from this master UI below:
Advanced use cases
The remote UI contains some parts, that might not be used as much, which are important to explain.
C-Play to dome (3D)
This button effectively is a shortcut to switch the current selected C-Play state to either “Atlas 3D”, “Bravo 3D” or “Draco 3D”. Same as in the Projectors section. Notice you do not need to switch to “Atlas 2D”, “Bravo 2D” or “Draco 2D” with C-Play, as it can handle 3D and 2D content correctly without this switching.
3D -> 2D
The button named “3D -> 2D”, FORCES even 3D content to show as 2D content. This is the button you want to use, when you want to show a 3D movie in the dome, without the use of 3D glasses. You want to disable this one to make it 3D correct again.
Background
This button enables and disables the background, if you would like the dome to fade to black or the background image, when you want to hide the video.
Presentation Projector
This opens and closes the shutter of the presentation projector, but also puts a black mask on top of the C-Play content that corresponds to the projected footprint on the dome of the presentation projector. This allows you to have a PowerPoint in the middle of the dome from a laptop, while also having surrounding content shown by the dome projectors.
360 Spin
C-Play supports 360 movies and images (2D and 3D). However, in the dome, the content shown from that video is usually only half of it. To create an interactive moment in the 360 video, or to show another side, there is a button to rotate the sphere around and also transition the sphere to another defined state (see Grid/mapping settings to change this state).