Audio Muxer
The Tools > Audio Muxer dialog combines mono channel files into one multi-channel WAV file. It is useful when a production exports one WAV file per speaker channel and the playback system expects a single interleaved file.
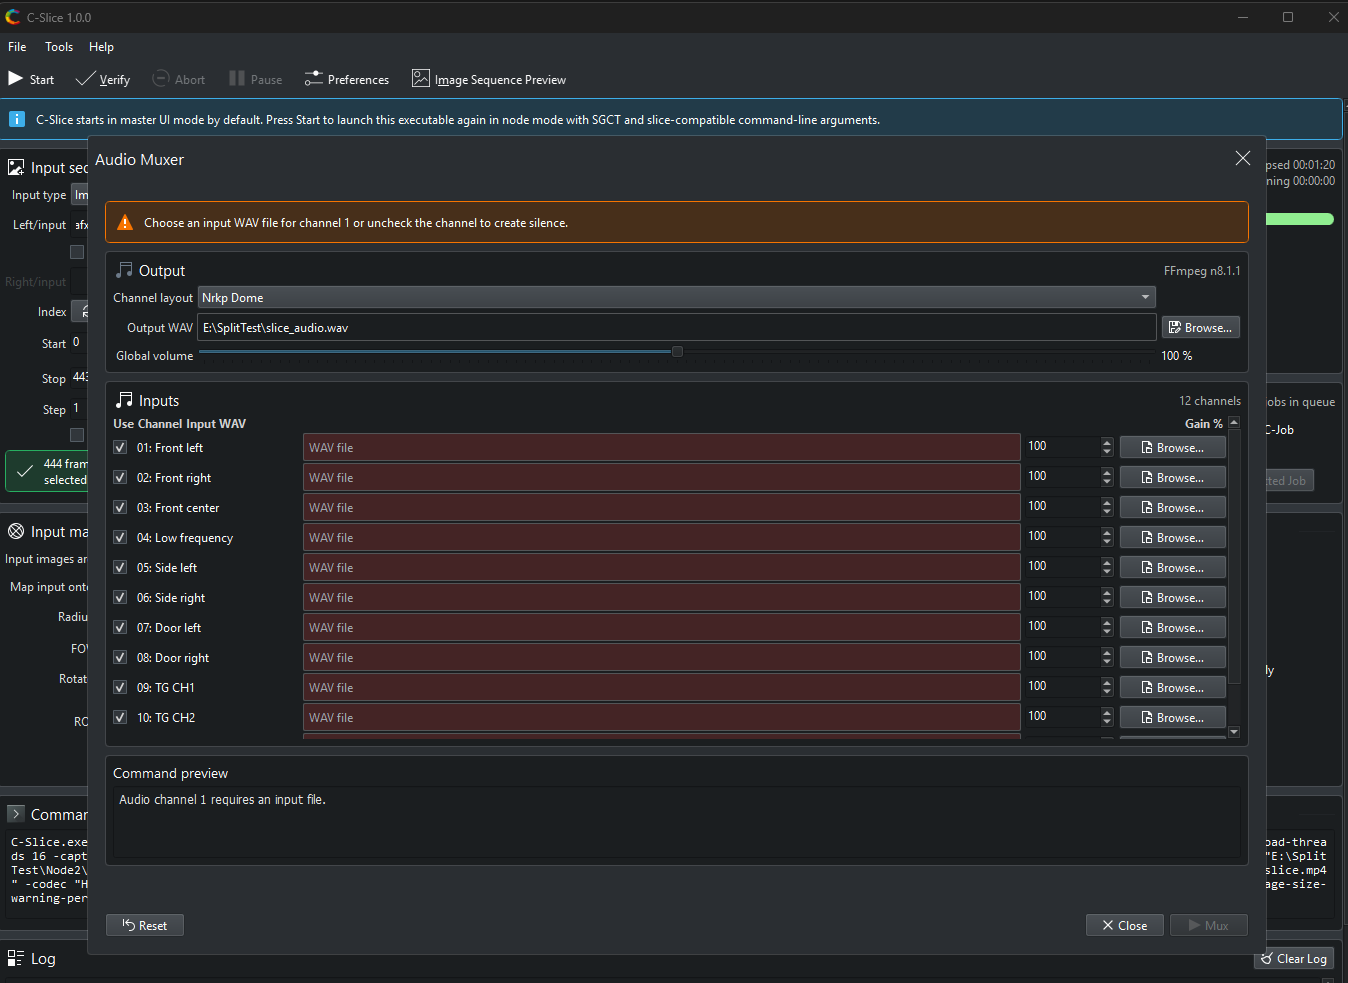
Basic workflow
- Open Tools > Audio Muxer.
- Choose a channel layout.
- Choose an output WAV file.
- Assign input WAV files to the active channels.
- Uncheck channels that should be filled with silence.
- Adjust global volume or per-channel gain if needed.
- Start muxing.
Unchecked channels are filled with silence in the FFmpeg filter graph. Global volume and per-channel gain are multiplied before muxing.
Channel layouts
Layouts are read from data/audio-channel-layouts.json. If the file cannot be read, C-Slice falls back to built-in Stereo, 5.1, 7.1, 9.1, and Nrkp Dome layouts.
The layout file has this shape:
{
  "layouts": [
    {
      "name": "Nrkp Dome",
      "channels": [
        "01: Front left",
        "02: Front right",
        "03: Front center"
      ]
    }
  ]
}
Edit the layout names and channel labels to match the venue or production convention.
FFmpeg requirement
The Audio Muxer needs ffmpeg.exe next to C-Slice or available on the system PATH.